A Visual Guide to Online VIKOR Software
Utilizing VIKOR software is straightforward: (1) Specify the number of alternatives and criteria. (2) Input the decision matrix data. (3) Obtain the comprehensive output
1. Input the Project Name
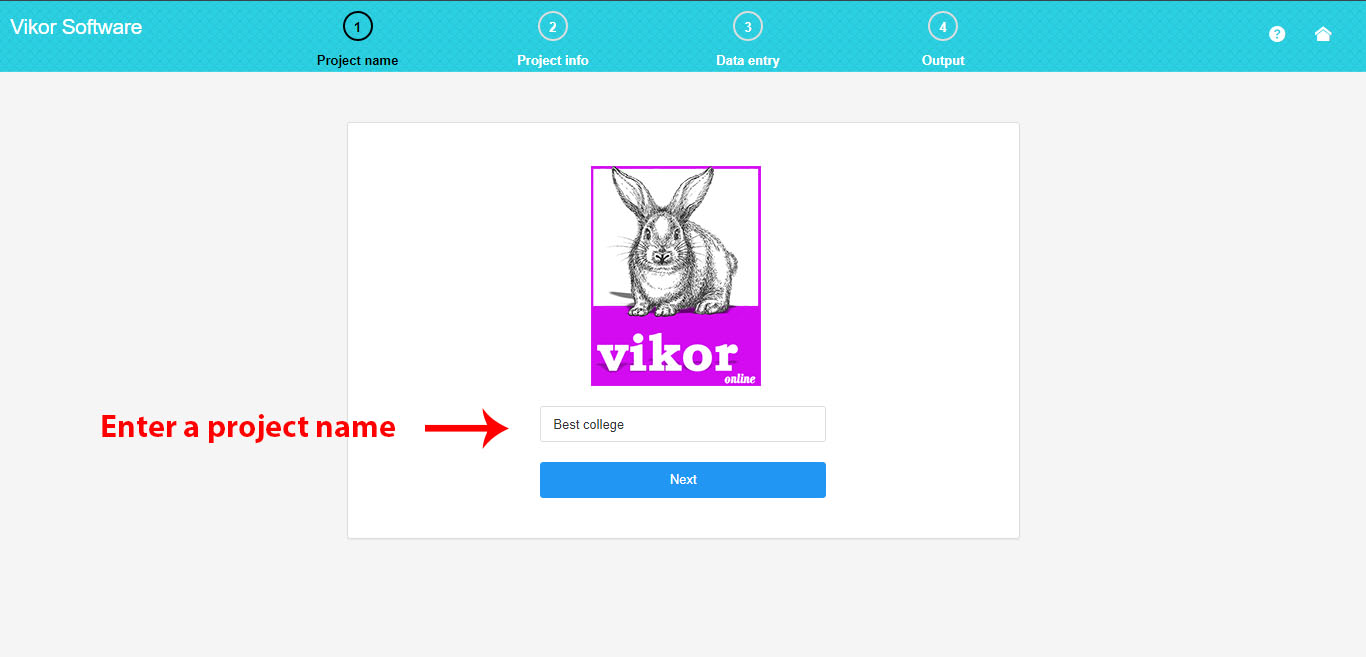
Begin by entering your project name. In this project, the VIKOR method is applied to select the best college.
2. Project Specifications
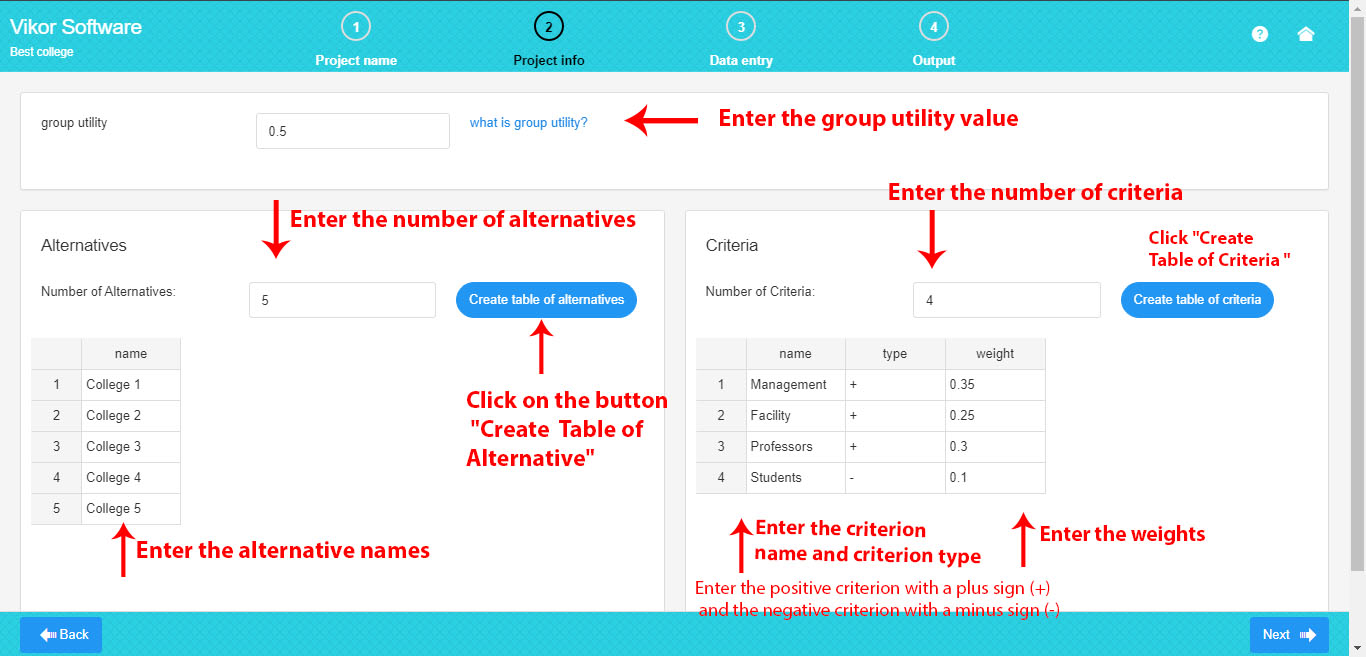
Here, you can define the number of alternatives and the number of criteria and the value of the group utility.
Criteria:
To select the desired name for the criterion, click on the criterion name and enter your own desired name that is short to write.
Enter each criterion in the column of the table, and then click on the button “Create Table of criteria”. This will create a table of criterion specifications.
In the criterion table, you can enter the name for criterion, criterion type and the weight of the criterion. The criterion type can be either positive or negative, which must be denoted by the plus sign (+) or the minus sign (-) in the criterion table.
Alternatives:
If you want to choose the desired name for the alternative in name column, enter your desired short name.
Group Utility:
The group utility value lies between 0 and 1, which is assumed to be 0.5. Click on the link “What is group Utility” in the software to get familiar with this variable.
3. Enter the Decision Matrix Data
Here, you can fill the decision matrix based on the number of criteria and the number of alternatives. Criteria are placed in columns and the alternatives are placed in rows.
To fill the decision matrix, you can simply click each cell of the matrix and enter your own data.
It is recommended that you enter data in Excel in order to avoid wasting time and then copy and paste the matrix data from Excel at once.
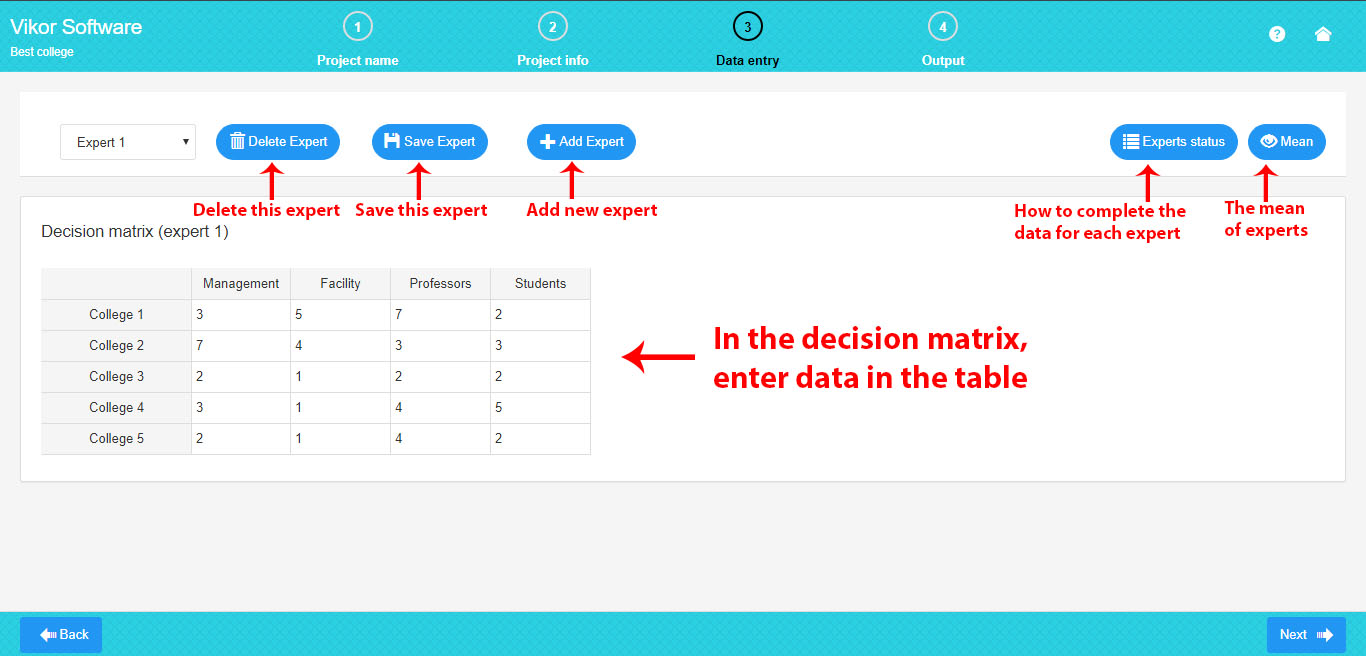
As you can see on the picture above, experts include the following:
Add Expert: If there are several experts, you can increase the number of experts by clicking “Add Expert”. The previous expert will be automatically saved by clicking on the button “Add Expert” and the new expert will be added.
Delete Expert: The current expert will be deleted by clicking on the button “Delete Expert”.
Save Expert: The data of current expert will be saved by clicking on the button “Save Expert”.
The experts’ Status: The experts’ Status will be displayed by clicking on the button “The experts Status”
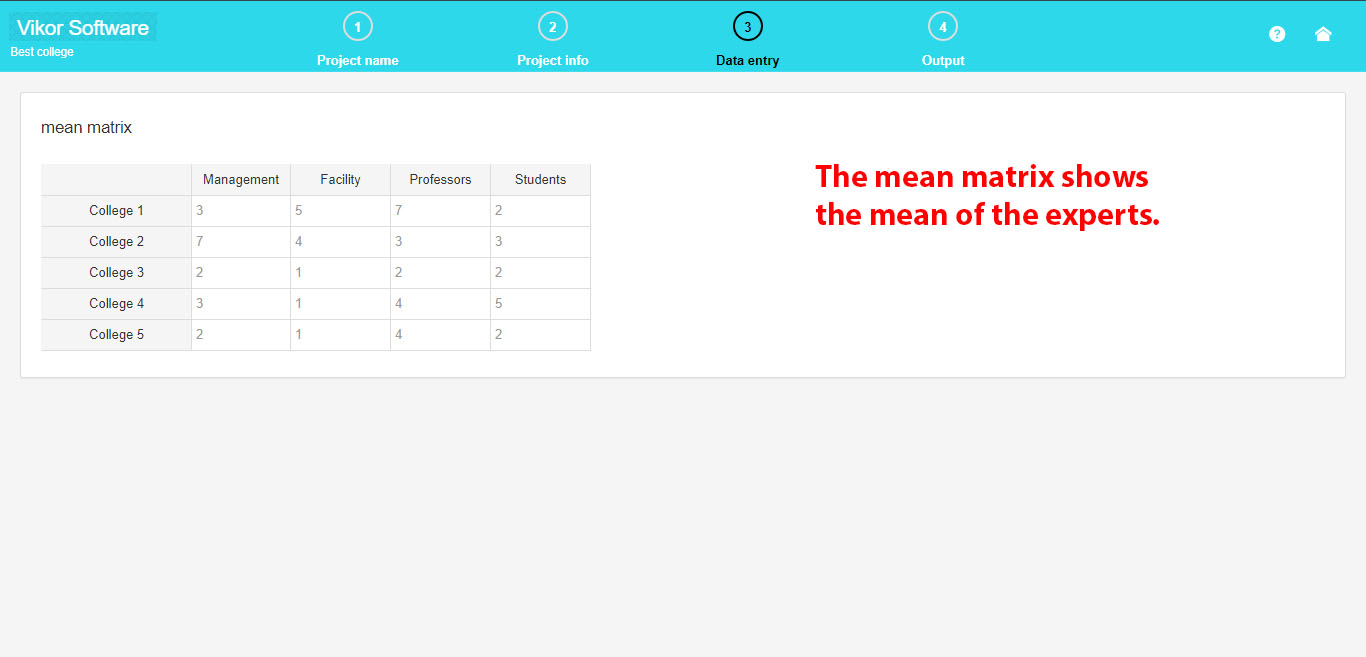
Mean: The average of all the experts will be observed by clicking on the button “Mean”.
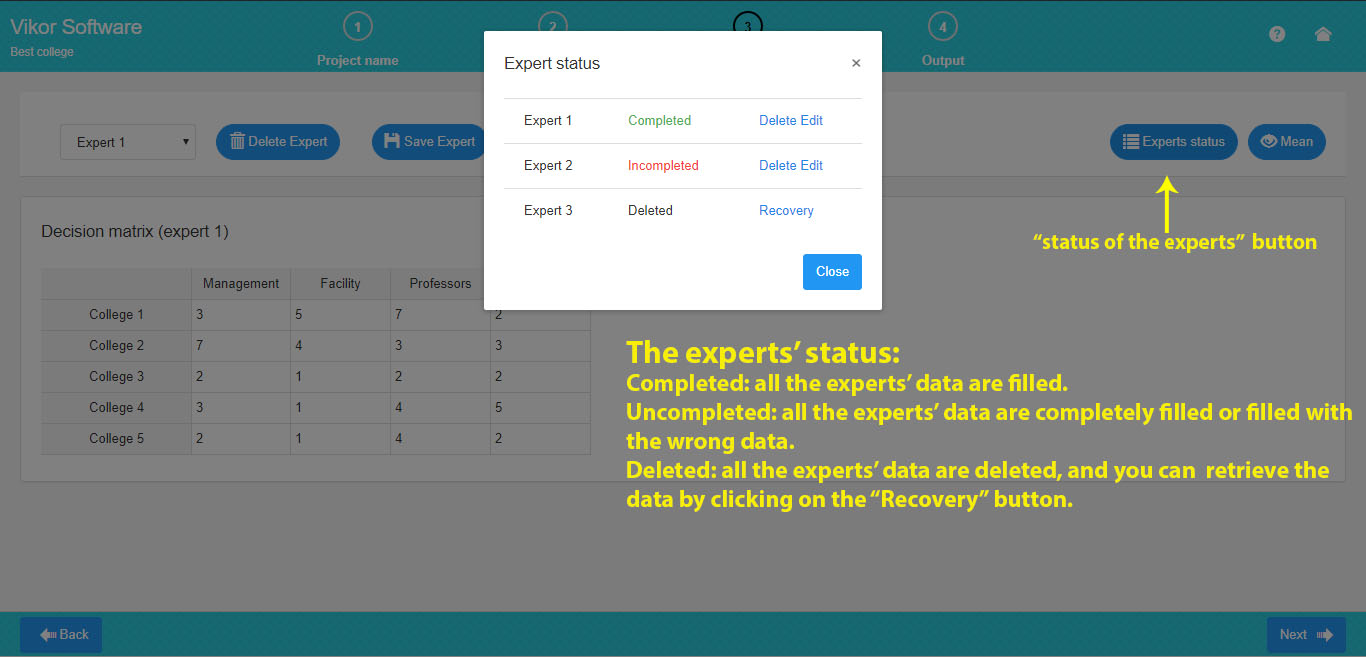
As you can see in the picture below, the experts’ status include the following:
If all the expert data are completed and saved, the expert’s status is “completed”.
If all the expert data are not completed, the expert’s status is “incompleted”.
If an expert has been deleted, the expert’s status is “deleted” and you can retrieve the data.
To observe the mean, the data of all current experts must be completed.
5. Get the Full Report
You can get the full output of the VIKOR method. Here, there are all the steps of the VIKOR method along with the related tables or formulas.

6. Download Excel and Word
Here, you can download the Word report file, Excel file and input data.

